

Best tank for THC or CBD E Juice…and physics
Around the year 1666, Isaac Newton (January 4th 1623 – March 31st 1727) returned home from Trinity College, as the school was closed due to the Great plague. It was rumored that during this break was when he observed an apple falling from a tree and wondered why. The answer solved our problem.
Lessons learned
Throughout my time testing and searching for the best tank for THC or CBD e juice I have found that temperature control is highly desirable at 388F. I cover that idea in my Spruzza article. Your main body of mix should be kept separate from the coil, especially if you have no temp-control. I have also learned that ceramic wicks are more durable than cotton and Wax Liquidizer e juice with full spectrum concentrate doesn’t like to climb against gravity. I learned that latter lesson long ago when testing ceramic-tower coil designs. But when I compared the Uwell Fancier with the Vandy Vape Pyro the message really hit home.

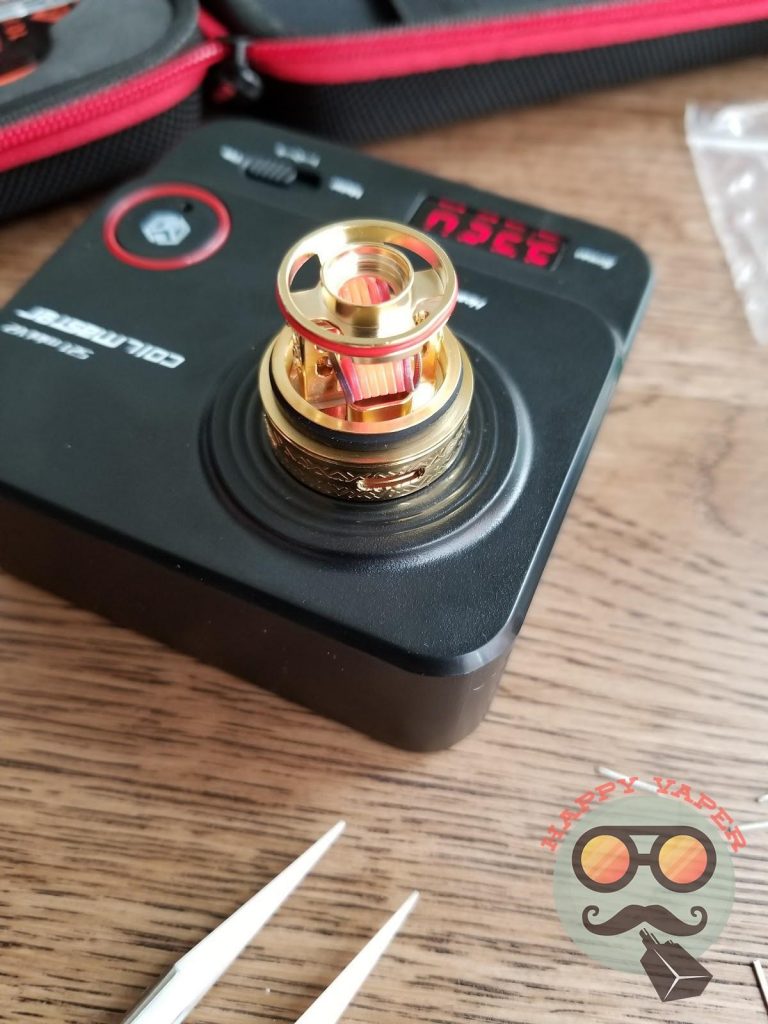
Lost Vape Paranormal DNA250C above the Vandy Vape Pyro (left) and Uwell Fancier (right)
They are both gold. I mean “Fancier” has to be Gold..right? Both are RDTA. That means they can be used either as a Rebuildable Tank Atomizer or a Rebuildable Drip Atomizer, which I found is actually extremely beneficial for us. Both have separate reservoirs from the coil area when used as an RTA. They both have 810 drip tips. And that is where the similarity ends.
Vandy is 24.4mm in diameter and the Fancier is 24 even. The Fancier is taller than the Pyro at 56.33mm and 34.55mm resepectively. The Pyro has a postless build deck and can accommodate a single or dual coil build. The Fancier has a velocity style two post quad terminal build deck. Each terminal measures 2.5mm. Vandy has a mixed airflow while the Fancier has bottom. But the most important of all features is the wicking.
On the Pyro your wick hangs down, as usual. On the Fancier they are strung upwards through wicking ports. This feature I found to be most important of all.

Lost Vape Paranormal DNA250C
I would need good temp control for proper comparison. To help combat any unexpected operation and limit the snap crackle pop of a poor TC chip, I used the Lost Vape Paranormal DNA250C during testing. This would give me great temp control and accurate firing. The golden standard of temp control is DNA by evolve and to a lesser extent YiHi. I highly recommend the Paranormal DNA250C. I’ll have more on it and its special talents in another upcoming article.
Uwell Fancier with included Ni80 coils.
Coils
Coils are a personal preference for everyone. I will say that we, of course, need temp control at 388F-395F and 40ish Watts. That narrows your choice and I personally like fused claptons. I can recommend Advanced Vape Supply for SS wire and prebuilt coils of excellent quality and prices. They have nothing but positive opinions from everyone I know who purchases from them. There is a link to the recommended coil and a coupon code at the end of the article. The suggested coil takes into consideration the order of importance: Spitback, Taste, Clouds. But the choice of suppliers, coil builds and materials is yours..as long as you have temp control coils.
On that; I have been informed that the best Stainless Steel for temperature control is 430 which has a much higher TCR than SS316L. The better temp control apparently sacrifices corrosion resistance and durability, however. I have not tried myself yet, but will going forward and will get back to you with results on future articles.
Some advice when installing coils on the Fancier is to put them just over the air-vents i.e. not touching the deck but just barely above. This will give much more flavor than having them higher up. Also space your coils.
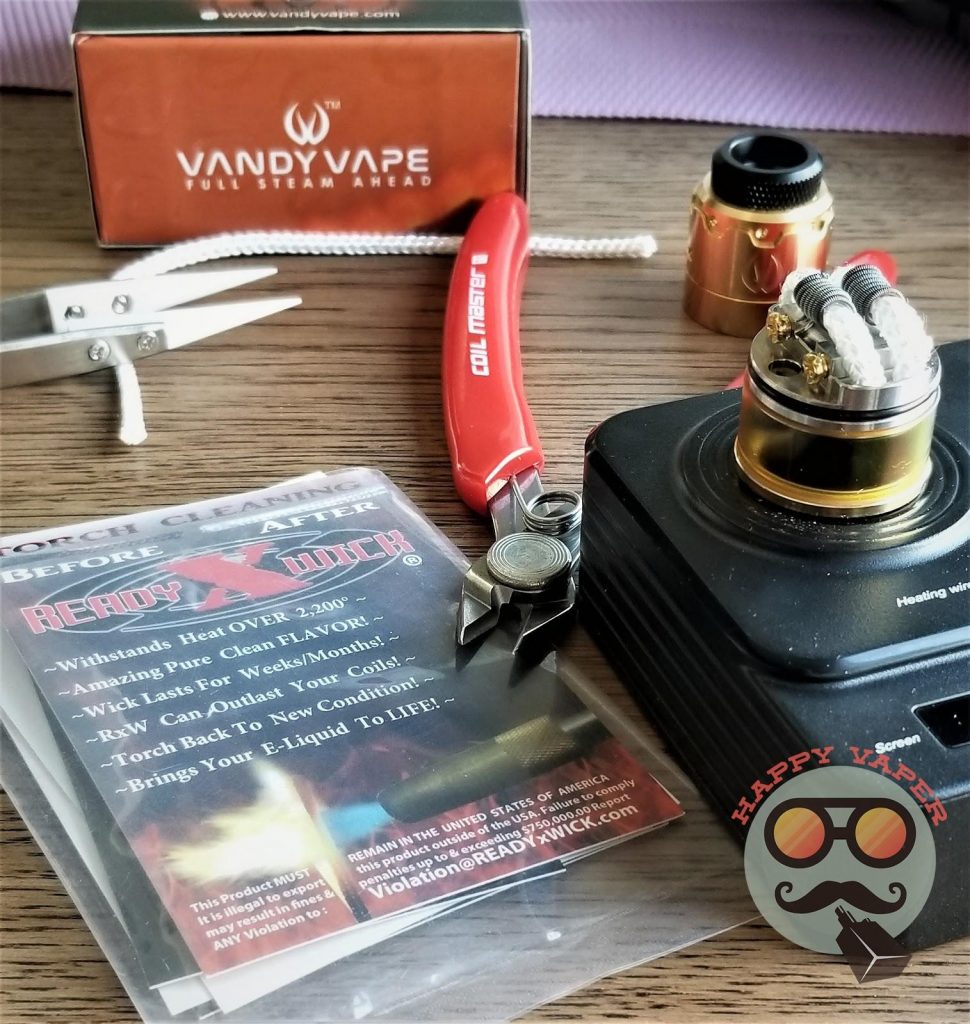
Vandy Vape Pyro & Ready X Wick soft ceramic
The Winner
To be honest given my experience thus far I didn’t have any hope for the Fancier. I thought the cotton would burn/shrink/pop…whatever and the mix would flow into the lower coil chamber. The only reason I purchased was because it seemed to be more or less opposite of the Pyro and thus good for a comparison. Initially, I had thought a special wick-material would work with the Pyro and make it compatible with our mix.
When building the Vandy I went with a cotton wick first then tried Ready X Wick, which is a soft ceramic. This kind of material is generally used by NASA..but vapers need it for blast off too! The space-age Ceramic fared better but ultimately didn’t wick well enough.
The full spectrum mix, I would learn again, is not a fan of climbing against gravity..quite the opposite. The coil gunked up much faster as it was not juicy enough. The juice that was there burned because it was too dry. Moreover, the now blackened and gunky juice on the coil was able to leach its way down into the main tank of mix…a BIG no no. So in the case of the Vandy Vape Pyro…Gravity was a constant enemy.
The Pyro did not work out for THC/CBD e juice with Wax Liquidizer as such and failed our test miserably. I did put some 0% Naked100 Go Nana’s in the Pyro later and it was lovely for that…if not a little spitty.
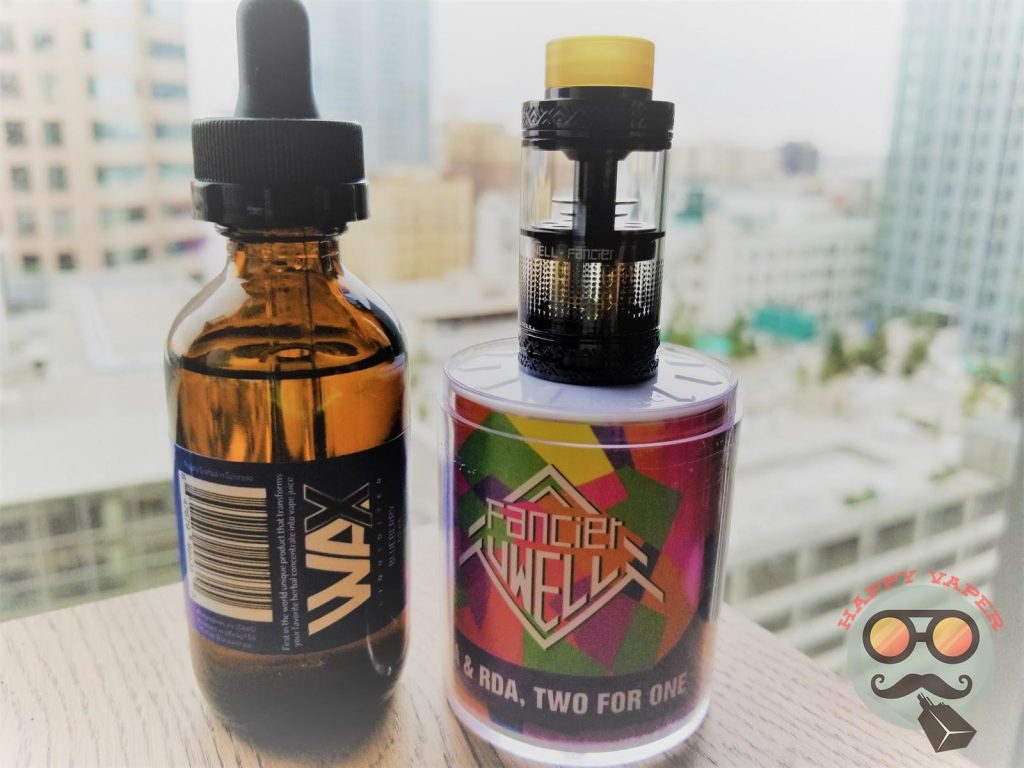
Wax Liquidizer Blueberry & UWell Fancier
The Fancier, however, passed with flying colors. It is the winner of the best tank for THC/CBD e juice and my personal favorite of vape-tools! It is wonderful and just what the pot doctor ordered. Great taste, little spitback and big dense clouds. You can read about Mrs. Vaper’s favorite in the next article:)
The effects and consideration of gravity for wicking is exactly what I was missing from the equation for finding the best tank. It has given me other ideas as far as a direction for future tanks and builds but this is the only reliable RTA I have found for a full spectrum e juice mix with Wax Liquidizer..at the moment.
The Oumier Gragas RDTA was a similar design in so far as the mix being above the coils but it used a terrible pump-balloon action thing that caused your mix to join your coils more often than not and the top airflow was terrible for flavor. Therefore, it was discontinued. I just learned about the Proto RTA as well. It seems like Uwell learned from the many downsides of them both and made a design which works fabulously.
The Fancier allows space to actually thread wick through the juice ports rather than awkwardly resting below the holes, unlike the Proto, and uses gravity+organic wicking unlike the Gragas. The glass tank of the Uwell allows you to see what’s happening inside ie whether you need to change cotton/coils or there is any leaking unlike the Proto.
The advantages of having the coils below the main tank are important ones. The mix being above the coil keeps it separate from the heat and clear as honey. The darkened juice on the coil is kept from leaching into the main body of mix, as it does not climb. There is much less spitback, which is common with our mix as there is a thinner air-path and more distance between your lips and the coils when used as an RTA. Even in RDA mode the cross plate of the upper port deck also helps prevent spitback. And of course The downward wicking keeps the coil nice and juicy.
Wicking
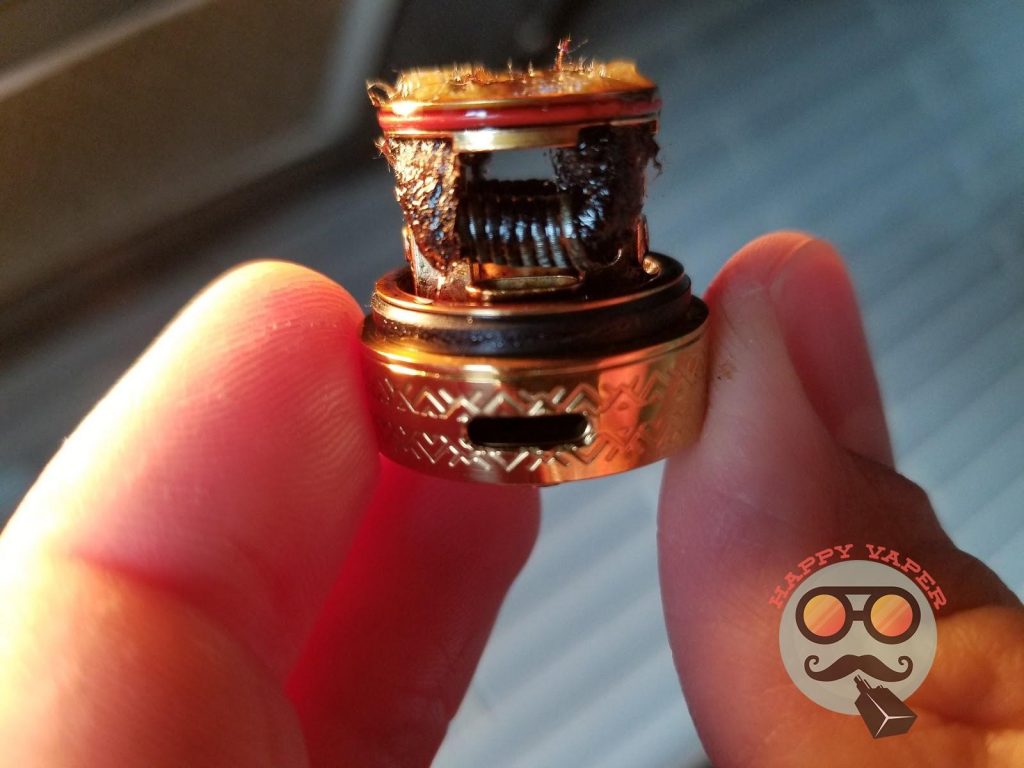
Wicking is the one area that you must be accurate with on the Fancier. If there is a weak link of the Uwell that is it. In fairness the weakness lies inside the one who wicks…or something.
There are scores of wicking tutorials on youtube for the UWell Fancier, so no need for another. If this is your first time, watch 3. They are all accurate but each will have a tiny variation that will give you ideas on which method is best for you. For example a German speaking guy trims his wicks down to size by picking at them with his fingers. I prefer scissors but each to their own.
I will offer some tips, however: The wick needs to be very generous so pull it tight to reduce size while threading through the coil. However, it still needs to be loose enough to wick. Stick with a 3mm coil and above to ensure you have enough wick. Take note that the 4 wicking ports on the Fancier are not the same size. Two are smaller. Only twist one end of your wick when threading through the coil. Thread this twisted end through the coil towards the smaller wick-port. Now push your wicks up through the juice ports. Once through, comb/fluff the ends and trim with scissors, until flush or slightly above the rim of the RTA port-deck. Then lightly comb and spread the remaining wick around the inner diameter of the rim to more or less cover the juice port deck.
Fancier port-deck
The final result is that the wicks should be flush with or slightly below the rim of the “port-deck”. Saturate the tops of the wick first and then turn over to juice up the coil area.
There are many types of wicks. I recommend Muji pads or some other Japanese Organic Cotton pad as a budget buy and with a Scottish Roll are very tasty. I also hear alot about Swag cotton now. It peaks my interest, so have ordered some. It is supposedly better suited to higher temps and thus less susceptible to shrinking. We don’t want the cotton in the juice ports to shrink, lest the mix pour through. On that; when wicking, if you have the feeling that it may not be enough or it isn’t “perfect”..start over. I have only had one leak and it was when I knew it wasn’t perfect but let it slide. I generally change the cotton after every 4ml ie 1 tank.
Could still be vaped, it’s plenty juicy:)
Cleaning & Happy Surprises
Before re-wicking, you must first clean the coil since it will be gunky from lipids. Remove the red o ring around the RTA port deck and black o ring on the base. Put just enough ISO in a shot-glass to cover the coils when the base is upside down, i.e. coils down, but enough to cover the airvents. Do 2-3 “baths” until the Iso is clean. Once coils dry, rinse with water. Then, when dry again, fire the coils to finish cleaning before re-wicking. When properly wicked there has been no leakage in my pocket or anywhere else. But there was that one time. I learned something else “Fancy” about this RDTA when it did.
When I realised it was leaking into the bottom area I closed the airflow and turned it on the drip tip so that the juice would flow back into the upper chamber. I could now unscrew the base and re-wick the coils…but for two issues.
First, the wicks were still juicy. I am loathe to waste so much concentrate. No problemo! Just tuck the wicks into the base’s RDA well and put on the RDA top cap. Finish Vaping what’s in the wick..YAY! That Fancy feature makes us all a Happy Vaper.
Second, this is the best tank for THC and/or CBD e juice. That means “Sticky”. You need to clean the coils and the base, including the air vents. Remove the red upper and black lower o-rings from the base. Put the, now all metal, base into ISO. Repeat a couple of times until clean. Use coconut oil or grapeseed oil, to clean the o-rings of any mix. Rinse off remaining oil with water and reinstall. Follow previous instructions on wicking, reattach the base to the top and you are good to go.

Wax Liquidizer & Concentrates from Herb.delivery
The mixture
I find that a slightly thicker ratio than I normally use with big tanks is better at 1g concentrate to 2.5ml Wax Liquidizer. If using CBD Oil start with a 1:1 if not full spectrum and 1:1.5 if so. This keeps it from being too thin and easily flooding. A question I am often asked about the larger systems is “does it eat more juice”. The answer is of course, yes. You are taking in far more with each inhalation. That’s a good thing. The ratio of liquidizer to concentrate is higher and therefore any smaller amounts of waste due to changing a coil/wick is very little concentrate loss. Of course we want zero loss. For that the journey and searching must continue for the next Best Tank for THC/CBD E Juice.
Get your SS316L claptons (26g/30g, 3mm, 8 wraps) from Advanced Vape Supply and use code AVS for 20% off.
As always, thanks for reading and join me back here next week for a new “Best Of” article.
Happy Regards,
